• Contact
  • Contact Us
  • Disclamer
  • Home 1
  • Home 2
  • Home 3
  • Privacy Policy
Friday, June 6, 2025
How VPS - How to use/setup VPS
  • Login
  • Home
  • Management guides
    • Web servers software
      • Directadmin
      • Hocvps Script
      • Centmin Mod
      • CWP
      • Kloxo-MR
      • Plesk
    • Control Panels
    • Securing VPS/Servers
      • SSL Certificates
      • Upgrading
      • Authentication
  • Operating System
    • CentOS
    • Fedora
    • Debian
    • Linux
    • Arch
    • BSD
    • CoreOS
  • Reviews
  • Coupon
    • Domain Coupon
    • Hosting Coupon
No Result
View All Result
How VPS - How to use/setup VPS
No Result
View All Result
Home Control Panels

How to Install a Jenkins Automation Server on Ubuntu 18.04

How VPS by How VPS
November 2, 2018
in Control Panels
0
How to Install a Jenkins Automation Server on Ubuntu 18.04
0
SHARES
12
VIEWS
Share on FacebookShare on Twitter

Contents

  1. Introduction
  2. Before You Start
  3. Step 1 – Installing Java
  4. Step 2 – Installing Jenkins
  5. Step 3 – Configuring UFW Firewall
  6. Step 4 – Configuring Jenkins
  7. Conclusion
  8. Check out these top 3 Linux hosting services
    1. Was this article helpful?

Introduction

Jenkins is a unique automation server-based app that runs in a Java servlet container. The service supports a variety of Social Control Management (SCM) software systems such as SVN, Git, and Mercurial. It’s also a free software under MIT License.

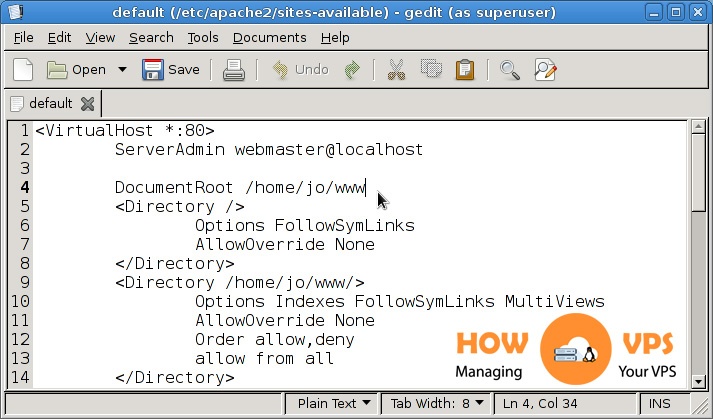
This guide will take you through the process of installing Jenkins on an Ubuntu 18.04 VPS.. We will start by running Jenkins on our domain name hosting, then install it under Apache server and configure it as a reverse server proxy.

Before You Start

Before you begin, you need the following: An Updated Ubuntu 18.04 VPS or dedicated server.

Step 1 – Installing Java

Since Jenkins runs on Java, you need to start by installing Java OpenJDK on your server. Java can be installed from a PPA repository with the command below:

$ sudo apt install software-properties-common apt-transport-https -y
$ sudo add-apt-repository ppa:openjdk-r/ppa -y

Next, install Java with the apt command:

$ sudo apt install openjdk-8-jdk -y

Once the installation process is done, confirm that the right java version has been installed successfully:

$ sudo java -version

Now, Java OpenJDK will be installed successfully on your Ubuntu server.

It is important to note that if your system has several java versions, use the following command to modify the java’s default version:

$ sudo update-alternatives --config java

Step 2 – Installing Jenkins

Jenkins features a functional repository for Ubuntu that is an essential package when installing Jenkins.

To add GPG keys and Jenkins repository to your system run the following command:

$ wget -q -O - https://pkg.jenkins.io/debian-stable/jenkins.io.key | sudo apt-key add -

Once you have enabled Jenkins repository, run the command below to append the package repository for Debian to refer to the sources.list of your server:

$ sudo sh -c 'echo deb http://pkg.jenkins.io/debian-stable binary/ > /etc/apt/sources.list.d/jenkins.list'

Next, make the apt packages are up-to-date then install the most recent Jenkins version using the following command:

$ sudo apt update
$ sudo apt install jenkins

Now, Jenkins will start automatically once the process is complete. Make sure you set it to start at boot time.

$ sudo systemctl start jenkins
$ sudo systemctl enable jenkins

Check to confirm that Jenkins is working properly on Ubuntu 18.04:

$ sudo systemctl status jenkins

The following output will be displayed on your screen:

●jenkins.service- LSB: StartJenkinsatboottime
Loaded: loaded(/etc/init.d/jenkins;generated)
Active: active(exited)sinceWed2018-09-2215:18:22PDT;5min32sago
    Docs: man:systemd-sysv-generator(8)
    Tasks: 0(limit:2319)
CGroup: /system.slice/jenkins.service

Step 3 – Configuring UFW Firewall

Jenkins is designed to run on port 8080. In this step, we’ll open this port via the ufw:

$ sudo ufw allow 8080

Next run the command below to confirm the ufw status:

$ sudo ufw status

This will give you an output similar to:

Status: active

To                         Action      From
--                         ------      ----
OpenSSH                    ALLOW       Anywhere
8080                       ALLOW       Anywhere
OpenSSH (v6)               ALLOW       Anywhere (v6)
8080 (v6)                  ALLOW       Anywhere (v6)

In case, the ufw is inactive, execute the commands below to activate it and enable OpenSSH

$ sudo ufw allow OpenSSH
$ sudo ufw enable

That is it! The firewall is fully configured, plus Jenkins is installed. That means, you can now proceed with the initial Jenkins setup.

Step 4 – Configuring Jenkins

To Configure Jenkins after it’s installed, go to port 8080 on your browser, enter your domain name and IP address then http://your_ip_or_domain:8080. The following screen will appear:

How to Install a Jenkins Automation Server on Ubuntu 18.04

In the installation process, Jenkins installer automatically creates a password with 32 characters. To copy the password file to your terminal using the command below:

$ sudo cat /var/lib/jenkins/secrets/initialAdminPassword

Locate the Administrator Password box and enter the password then press Continue.

You will get a screen that prompts you to install some recommended plugins for Jenkins. Select Install Suggested Plugins.

How to Install a Jenkins Automation Server on Ubuntu 18.04

The next page will show that the installation is in progress.

How to Install a Jenkins Automation Server on Ubuntu 18.04

After Jenkins plugins are implemented successfully, you will be asked to create an admin account. Enter the required information then press Save and Continue.

How to Install a Jenkins Automation Server on Ubuntu 18.04

You will be prompted to enter Jenkins instance URL. Include the domain for Jenkins then press Save and Finish.

How to Install a Jenkins Automation Server on Ubuntu 18.04

After the admin user account is created, you will get a confirmation screen showing “Jenkins is ready.”

How to Install a Jenkins Automation Server on Ubuntu 18.04

To visit Jenkin’s main dashboard page, press “Start using Jenkins.”

How to Install a Jenkins Automation Server on Ubuntu 18.04

Now, Jenkins has been successfully installed on your Ubuntu 18.04 system.

Conclusion

You have successfully installed and configured Jenkins on your Ubuntu 18.04 server.

Check out these top 3 Linux hosting services

0

Was this article helpful?

Submit
Previous Post

How to Alter PHP Apache Module Configuration Settings

Next Post

Pssh – Execute Commands on Multiple Remote Linux Servers Using Single Terminal

Next Post

Pssh – Execute Commands on Multiple Remote Linux Servers Using Single Terminal

Leave a Reply Cancel reply

Your email address will not be published. Required fields are marked *

No Result
View All Result

Recent Post

Install Imagemagick on CentOS
CentOS

Install Imagemagick on CentOS

by How VPS
June 28, 2023
0

This is how I installed Imagemagick on a vanilla CentOS server Start off by installing the prerequisites yum install php-pear...

Read more
how to Check phpinfo

How to Check phpinfo of Hosting or VPS?

June 28, 2023
Failed to download metadata for repo 'appstream' on Centos 8

How to fix error: Failed to download metadata for repo ‘appstream’ on Centos 8

February 25, 2022
How to Fix MySQL Error "Plugin 'InnoDB' registration as a STORAGE ENGINE failed"?

How to Fix MySQL Error “Plugin ‘InnoDB’ registration as a STORAGE ENGINE failed”?

November 17, 2020
How to optimize Mysql or MariaDB

How to optimize Mysql or MariaDB

November 3, 2020

Recent News

  • Install Imagemagick on CentOS
  • How to Check phpinfo of Hosting or VPS?
  • How to fix error: Failed to download metadata for repo ‘appstream’ on Centos 8

Category

  • Arch
  • Authentication
  • Backups
  • BSD
  • Centmin Mod
  • CentOS
  • Control Panels
  • CoreOS
  • CWP
  • Debian
  • Directadmin
  • Encryption
  • Fedora
  • Firewalls
  • Hocvps Script
  • Hosting providers
  • Kloxo-MR
  • Linux
  • Mitigations
  • Operating System
  • Plesk
  • Reviews
  • Securing VPS/Servers
  • Security Patches
  • SSL Certificates
  • Uncategorized
  • Upgrading
  • VPS/Servers management guides
  • Vulnerability Detection
  • Web servers software
  • Webhosting Control Panel
  • About
  • Advertise
  • Careers
  • Contact

© 2025 JNews - Premium WordPress news & magazine theme by Jegtheme.

No Result
View All Result
  • Home
  • Management guides
    • Web servers software
      • Directadmin
      • Hocvps Script
      • Centmin Mod
      • CWP
      • Kloxo-MR
      • Plesk
    • Control Panels
    • Securing VPS/Servers
      • SSL Certificates
      • Upgrading
      • Authentication
  • Operating System
    • CentOS
    • Fedora
    • Debian
    • Linux
    • Arch
    • BSD
    • CoreOS
  • Reviews
  • Coupon
    • Domain Coupon
    • Hosting Coupon

© 2025 JNews - Premium WordPress news & magazine theme by Jegtheme.

Welcome Back!

Login to your account below

Forgotten Password?

Retrieve your password

Please enter your username or email address to reset your password.

Log In