In this tutorial we will teach you how to setup an alternative DNS server called PowerDNS. It licensed under the GPL and can even be forked on Github. Unlike Bind, PowerDNS can be setup using a multitude of backends such as Bind Zone Files, or various Databases.
For this example we will setup PowerDNS using MySQL as the backend on CentOS 6. Additionally we will install, PowerAdmin which is a web based control panel for PowerDNS.
We will configure this server to support both Authoritative and Recursive queries. This will require 2 separate packages from PowerDNS as out of the box PowerDNS is Authoritative only. Luckily they also make a recursive server called PowerDNS Recursor that easily integrates with the Authoritative server.
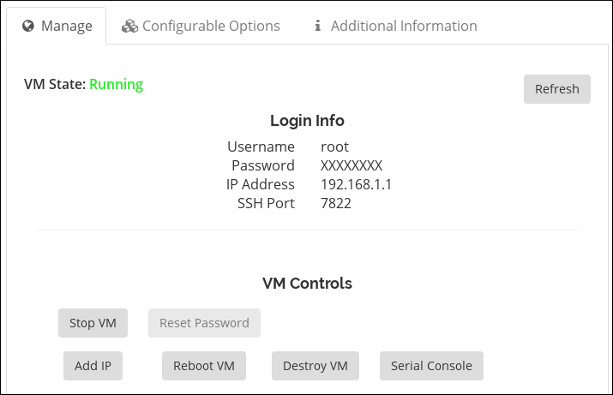
You will need a VPS or Dedicated Server to run PowerDNS on. A good VPS for this purpose is ZoomCloud.net’s 1GB VPS. For only 19.99 a month you get a really fast DNS server that will serve you for years to come.
Prerequisites
First you need to install a few Prerequisites on your VPS or Dedicated Server before you can configure PowerDNS. You will need to install a web server like Apache, PHP modules, MySQL Server and Client.
|
1
2
3
|
yum install httpd php mysql–server php–mysql
|
You should also set Apache and MySQL to start on reboot.
|
1
2
3
4
|
chkconfig mysqld on
chkconfig httpd on
|
Setup Database for PowerDNS
First you need to start the MySQL server.
|
1
2
3
|
service mysqld start
|
Next you need to set the MySQL root password.
|
1
2
3
|
usr/bin/mysqladmin –u root password ‘new-password’
|
Next you need to build a database for PowerDNS to use. We will use the native mysql client to do this.
|
1
2
3
|
mysql –u root –p
|
Now you can create and switch to the powerdns database.
|
1
2
3
4
|
CREATE DATABASE powerdns;
use powerdns;
|
Next you need to create the tables, columns, and indexes.
|
1
2
3
4
5
6
7
8
9
10
11
12
13
14
15
16
17
18
19
20
21
22
23
24
25
26
27
28
29
30
|
CREATE TABLE domains (
id INT auto_increment,
name VARCHAR(255) NOT NULL,
master VARCHAR(128) DEFAULT NULL,
last_check INT DEFAULT NULL,
type VARCHAR(6) NOT NULL,
notified_serial INT DEFAULT NULL,
account VARCHAR(40) DEFAULT NULL,
primary key (id) );
CREATE TABLE records (
id INT auto_increment,
domain_id INT DEFAULT NULL,
name VARCHAR(255) DEFAULT NULL,
type VARCHAR(6) DEFAULT NULL,
content VARCHAR(255) DEFAULT NULL,
ttl INT DEFAULT NULL,
prio INT DEFAULT NULL,
change_date INT DEFAULT NULL,
primary key(id) );
CREATE INDEX rec_name_index ON records(name);
CREATE TABLE supermasters (
ip VARCHAR(25) NOT NULL,
nameserver VARCHAR(255) NOT NULL,
account VARCHAR(40) DEFAULT NULL
);
|
It is not a good idea to use the root password for your PowerDNS installation. So you need to create a database user and grant them privileges to do anything to the database you just created.
|
1
2
3
4
5
6
|
CREATE USER ‘powerdns’@‘localhost’ IDENTIFIED by ‘changeTOpassword’;
GRANT ALL PRIVILEGES ON * . * to ‘powerdns’@‘localhost’;
FLUSH PRIVILEGES;
quit;
|
Installing PowerDNS
PowerDNS is available as a prebuilt RPM from the EPEL repo. You will need to install the repo before you can grab PowerDNS.
|
1
2
3
4
|
wget http://mirror.cc.columbia.edu/pub/linux/epel/6/i386/epel-release-6-8.noarch.rpm
yum install epel–release–6–8.noarch.rpm
|
Now that the repo is installed you can install PowerDNS.
|
1
2
3
|
yum install pdns–backend–mysql pdns pdns–recursor
|
Configuring PowerDNS
Now that your database is setup, you will need to make a few changes to the configuration file for PowerDNS.
|
1
2
3
|
vi /etc/pdns/pdns.conf
|
Uncomment the following line and set it to 127.0.0.1:5300. This tells PowerDNS to forward recursive queries to the PowerDNS-recursor server that will be listening on port 5300.
|
1
2
3
|
recursor=127.0.0.1:5300
|
Add the following to the launch section:
|
1
2
3
4
5
6
7
|
launch=gmysql
gmysql–host=127.0.0.1
gmysql–user=powerdns
gmysql–password=$pring2014!
gmysql–dbname=powerdns
|
Next you need to have the recursor listen on a different port as PowerDNS will already use udp port 53. You already configured PowerDNS to look for the recursor server on port 5300, so set the same in the recursors configuration file.
|
1
2
3
|
vi /etc/pdns–recursor/recursor.conf
|
Set the port to 5300
|
1
2
3
|
local–port=5300
|
In the allow from section lock it down to your loopback ip 127.0.0.1.
|
1
2
3
4
5
6
|
# allow-from If set, only allow these comma separated netmasks to recurse
#
#allow-from=127.0.0.0/8, 10.0.0.0/8, 100.64.0.0/10, 169.254.0.0/16, 192.168.0.0/16, 172.16.0.0/12, ::1/128, fe80::/10
allow–from=127.0.0.0/8
|
Next set the DNS and rDNS server to run on startup and start them manually for the first time.
|
1
2
3
4
5
6
|
chkconfig pdns on
service pdns start
chkconfig pdns–recursor on
service pdns–recursor start
|
If you are running IPTables, you will need to permit access through your firewall for http and DNS queries.
|
1
2
3
4
5
|
iptables –A INPUT –m udp –p udp —sport 53 –j ACCEPT
iptables –A INPUT –m tcp –p tcp —sport 80 –j ACCEPT
service iptables save
|
Installing PowerAdmin
First you need to install a few additional packages for PowerAdmin.
|
1
2
3
|
yum install php–gd php–imap php–ldap php–mysql php–odbc php–pear php–xml php–xmlrpc php–mbstring php–mcrypt php–hash gettext php–pear–DB php–pear–MDB2–Driver–mysql
|
Now you are ready to download and install poweradmin into your html directory.
|
1
2
3
4
5
6
|
cd /var/www/html/
wget https://github.com/downloads/poweradmin/poweradmin/poweradmin-2.1.6.tgz
tar xvf poweradmin–2.1.6.tgz
mv poweradmin–2.1.6 poweradmin
|
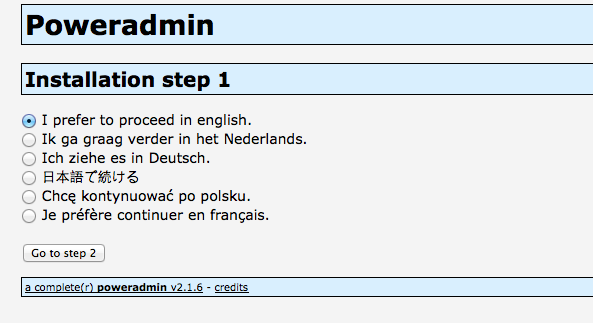
To continue configuring PowerAdmin you will need to open a web browser and goto http://youripadress/poweradmin/install
Step 1: Select your preferred language.
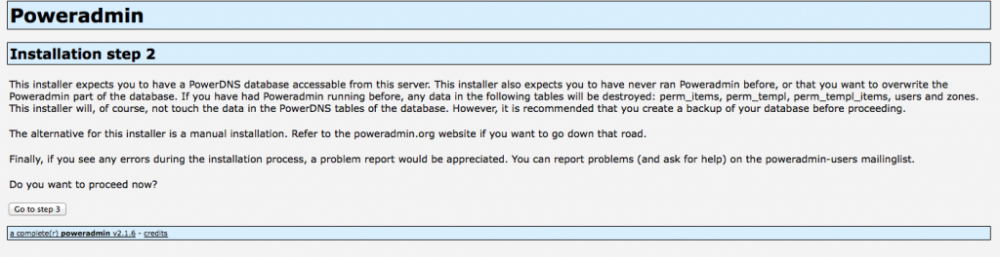
Step 2: Confirm your Database is good to go!
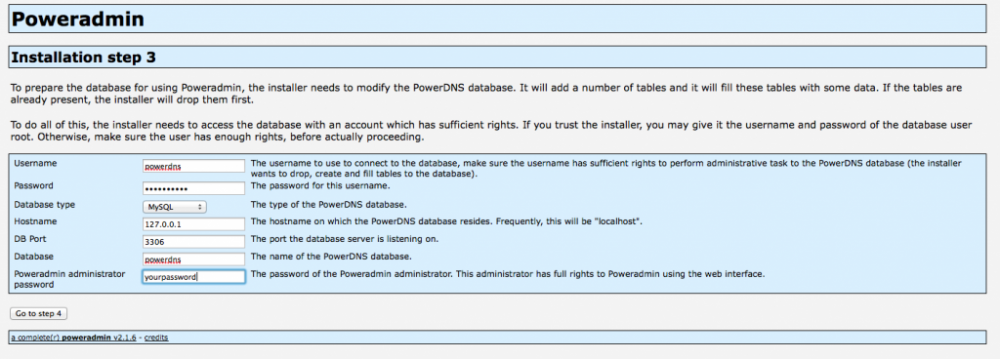
Step 3: Provide Database Details
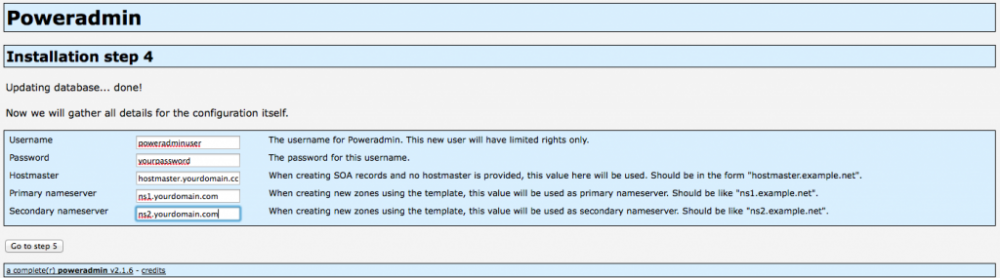
Step 4: Create PowerAdmin user and set Admin password.
Step 5: Create less privileged user in DB for poweradmin.
PowerAdmin will display a bit of SQL you will need to enter into your command line mysql client. Make the SQL changes then click Go to Step 6.
|
1
2
3
4
5
6
7
8
9
10
11
12
|
mysql –u root –p
use powerdns;
GRANT SELECT, INSERT, UPDATE, DELETE
ON powerdns.*
TO ‘newuserID’@‘localhost’
IDENTIFIED BY ‘NewPassword’;
quit;
|
Step 6: Create Config file for PowerDNS.
Power DNS will now present you with your php configuration file. Since your web server does not have permissions to create the file itself (this is a good thing) you need to manually create it.
|
1
2
3
4
|
cd /var/www/html/poweradmin/inc
vi config.inc.php
|
Now paste the configuration into this file and save and exit. And click Goto Step 7 in the installer.
Step 7: Remove the installer from your web directory.
PowerAdmin will not let you do anything if you don’t remove the install directory first. So go ahead and remove it now that your done configuring it.
|
1
2
3
4
|
cd /var/www/html/poweradmin/
rm –rf install
|
You should now be able to logon to PowerAdmin by browsing to http://ipadress/poweradmin/. You can login with admin password that was set during the installation process.
To test your new PowerDNS Server you can create a domain using the Poweradmin interface then use nslookup from a pc or server to query it. You can also do a few recursive lookups too to make sure that works.
|
1
2
3
4
5
6
7
8
9
10
11
12
13
14
15
16
17
18
19
20
21
22
23
24
25
26
27
|
nslookup
>server 64.20.33.252
Default server: 64.20.33.252
Address: 64.20.33.252#53
>mydomain.com
Server: 64.20.33.252
Address: 64.20.33.252#53
Non–authoritative answer:
Name: mydomain.com
Address: 123.123.123.123
>yahoo.com
Server: 64.20.33.252
Address: 64.20.33.252#53
Non–authoritative answer:
Name: yahoo.com
Address: 206.190.36.45
Name: yahoo.com
Address: 98.139.183.24
Name: yahoo.com
Address: 98.138.253.109
|
Thats all there is to setting up PowerDNS and PowerAdmin. In another tutorial we will show you how to add redundancy to this setup using two VPS servers. Stay tuned!
-Tutor