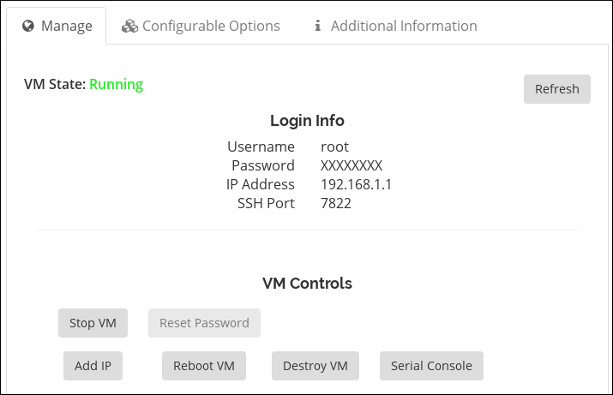
If you have an VPS, but you don’t know how to manage VPS without Cpanel. It’s no problem, we will guide you how to manage VPS with Centmin Mod on CentOS. First time, you need to know How to install Centmin Mod on CentOS.
How to install Centmin Mod on CentOS?
What is Centmin Mod?
Centmin Mod (Centminmod) also called Centmin Mod LEMP stack is a script which is auto installer takes the manual work out of the process and fully automates most of install, configuration, base optimisation and best recommended practices and settings for CentOS, Nginx, MariaDB MySQL, PHP, CSF Firewall security and other installed software.
The whole process is done via the core centmin.sh shell based script which can install Centmin Mod via a curl one liner install method. Centmin Mod does not have a web gui panel but rather allows the admin/owner to manage their server(s) on the SSH command line with added convenience of a shell based menu for commonly performed tasks.
A LEMP web stack is a set of open source Linux software which are together form the platform (web stack) where a web site’s files (text, CSS files, javascript, web fonts, videos and images) and data can be served to a visitor. Every web site you visit on the internet is powered by and served from some form of web stack software bundled together.
When your web browser connects to a web site, it is communicating with a web server requesting files hosted on the web server. This communication and transfer of data can either done in plain text unencrypted connections via HTTP or via secure encrypted connections via HTTPS (via SSL/TLS protocol).
Traditionally, such LEMP web stack’s software is manually installed one by one and then configured for serving web site’s files and data to visitors. This manual process can take hours to do from installation and then to configuring and optimising each component of the web stack.
LEMP stands for:
- Linux – Linux operating system. In Centmin Mod’s case CentOS Linux.
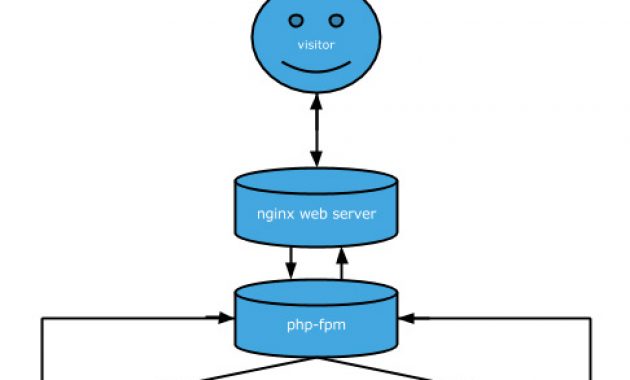
- Nginx – pronounced Engine-X is the web server listening on port 80 (HTTP) and port 443 (HTTPS). Nginx is what visitors visiting a web site interface with first as Nginx serves the data hosted on a web site to visitors. Nginx is much more than just a web server – see nginx.org for more details. Sometimes LEMP is refered to LNMP stack wher N is Nginx.
- MariaDB MySQL – MySQL database server fork, MariaDB. MySQL is an open source relational database server that listens on port 3306 by default and holds database data which is queried and written to by MySQL clients such as PHP.
- PHP – a server sided scripting language [wikipedia]. Centmin Mod compiles PHP as PHP-FPM (FastCGI Process Manager) which listens on port 9000 by default which can communicate with MariaDB MySQL database server to retrieve and store web site data.
LEMP is an alternative web stack to LAMP – Linux, Apache web server, MySQL and PHP. Apache is an alternative web server that has a longer history than Nginx and Apache is bundled in by default with alot of Linux distributions like Debian, Ubuntu, CentOS, Redhat and Fedora. As such Apache is the more common web server powering web sites [netcraft server survey].
However, Nginx is faster and more efficient and scalable than Apache and has a larger growing rate of the market share for the busiest web sites online [w3techs]. The majority of all internet web sites are either served and powered by a LEMP or LAMP web stack or a web stack with a web server other than Nginx or Apache.
Now, we will begin guide step by step for you can know “How to install Centmin Mod on CentOS?”
Installing Centmin Mod on CentOS
The following steps will allow you to install Nginx based Centmin Mod LEMP stack on CentOS 6 or CentOS 7 based server.
Installation Notes:
- SELINUX must be disabled.
- Initial Centmin Mod installation needs to be done as full root user rather than as sudo user and
centmin.shshell based menu needs to be run as full root user. - Tip #1: For best security and performance you would want to use CentOS 7 with KVM based VPS server or dedicated servers. Centmin Mod can detect whether OpenVZ or Xen/KVM virtualization is being used and auto optimise the server environment based on that info. OpenVZ VPS due to the limitations and use of host level Kernel can not be auto optimized to the level that KVM, Xen or dedicated servers can.
- Tip #2: Centmin Mod currently DOES NOT fully support LXD/LXC containers due to the fact that not all web hosts properly configure LXD/LXC container at the LXD/LXC host level for CentOS support. Centmin Mod 123.09beta01 and newer, has preliminary and on-going developmental LXD support if LXD containers are properly configure at LXD host node level first. But it’s still a work in progress. See comment here & some of the LXD config issues LXD web host providers need to be aware of for CentOS here. If you’re using and configuring your own server with LXD containers, then you’d need to properly configure LXD at LXD host level. For least problems, use KVM VPSes instead.
- Tip #3: For best performance and latest feature improvements, install Centmin Mod 123.09beta01 version instead of stable version. Beta has PHP 7.2 & PHP 7.3 support which stable doesn’t have. See PHP 7.3 vs 7.2 vs 7.1 vs 7.0 benchmarks here.
- Currently, only x86/x86_64 architecture is supported and ARMv7/8 based cpus isn’t supported fully due to CentOS ARM compatibility with 3rd party YUM repositories that Centmin Mod uses. Hopefully, in future it maybe so keep an eye on Centmin Mod Community Forum’s Beta Release forums for any updates.
- For disk partitioning it’s recommended to have one large single root
/partition. Especially for CentOS 7.x.. If you plan to use Docker, pay attention to default file system used EXT4 versus XFS when formatting partitions (on dedicated servers). Details here. - Optimally, for KVM/Xen/VMWare or dedicated you should configure your server with at least 1GB to 2GB swap space if possible. This does not apply to OpenVZ VPS where you may not have control over swap depending on how OpenVZ is configured.
- Choose non-OpenVZ based VPS server i.e. dedicated, KVM, Xen or VMWare if you want to be able to tune TCP settings (sysctl.conf), update and use own Linux Kernels. You are not able to do those tasks with OpenVZ VPSes.
- Minimum system requirements are 256MB memory (128MB with variable tweak) for CentOS 6.x and 1GB memory for CentOS 7.x 64bit and 20GB disk space for OpenVZ VPS virtualization & 30GB for KVM and Xen virtualisation. These requirements were recently revised here.
- Recommended memory & disk requirements are double the mininum for CentOS 6/7 respectively at CentOS 6.x 512MB memory and CentOS 7.x 64bit at 2GB memory and disk space of 40GB for OpenVZ and 60GB for KVM/Xen virtualisation.
- If you plan on using PHP Composer for your web applications, you will want to have at least 3-4GB of memory on your server as Composer can use up to 1.5+ GB memory requirements itself and may require you raising the PHP memory_limit up to 1.5GB or more
- After install, check out the next steps in the Getting Started Guide and be sure to read how to update Centmin Mod code itself via Centmin Mod Upgrade page.
- If you’re looking for cheap VPS hosting for Centmin Mod, the following are highly recommended & proven to work with Centmin Mod LEMP web stack – Upcloud – signees also get US$25 credits to use as well, SSDNodes, ImpactVPS, BuyVM.net KVM Slices, RamNode, Linode, DigitalOcean and Vultr. If using OVH or SoYouStart servers, make sure to use CentOS OS template with distro kernels and not OVH/SYS provided custom kernels.
- Check out Centmin Mod VPS hosting & Centmin Mod Dedicated server hosting forums for VPS and dedicated hosting reviews, benchmarks and discussions with other Centmin Mod users.
- The Configuration Files page outlines all the Centmin Mod LEMP stack environments’ configuration files and their paths.
- After initial install, you can invoke the
centmin.shmenu as outlined at here.
Installation
The curl installer method was added from Centmin Mod 1.2.3-eva2000.08+ onwards and is the easiest way to install Centmin Mod which allows for fully unattended installs. It is the preferred method of installation as opposed to centmin.sh menu option 1 method.
It’s just one line you type in SSH session as root user on a fresh virgin CentOS 6 or CentOS 7 OS environment. Resource video also has an example install at Centmin Mod .08 beta SSH one liner install on CentOS 6 + CentOS 7 simultaneously.
Stable Release
Centmin Mod Stable Release Install: 123.08stable (supports PHP 5.5, 5.6 & limited support PHP 7.0. However, for PHP 7.0, 7.1, 7.2 & 7.3 support select the 123.09beta01 installer further below instead)
Note, it’s highly recommended to try new and much improved latest Centmin Mod beta below though as it’s much improved and will soon be latest stable once the updated documentation/guides are written up.
yum -y update; curl -O https://centminmod.com/installer.sh && chmod 0700 installer.sh && bash installer.sh
Beta Release
Centmin Mod Latest Beta Release Install: 123.09beta01 (PHP 5.4, 5.5, 5.6, 7.0, 7.1, 7.2 & 7.3 supported)
If you want to try new and much improved latest Centmin Mod beta, you can switch to using the betainstaller.sh one liner below. The latest beta also adds optional Auditd & MariaDB Audit Plugin support which you can try out. There’s also a tools/autoprotect.sh script you may need to tune to your web hosts’ web apps which rely on Apache .htaccess protection which isn’t supported by Nginx.
The beta installer has a choice of which version of PHP you want to default to on initial install. The 4 options are below:
default PHP 5.6 beta installer
yum -y update; curl -O https://centminmod.com/betainstaller.sh && chmod 0700 betainstaller.sh && bash betainstaller.sh
PHP 7.0.x default beta installer
yum -y update; curl -O https://centminmod.com/betainstaller7.sh && chmod 0700 betainstaller7.sh && bash betainstaller7.sh
PHP 7.1.x default beta installer
yum -y update; curl -O https://centminmod.com/betainstaller71.sh && chmod 0700 betainstaller71.sh && bash betainstaller71.sh
PHP 7.2.x default beta installer
yum -y update; curl -O https://centminmod.com/betainstaller72.sh && chmod 0700 betainstaller72.sh && bash betainstaller72.sh
PHP 7.3.x default beta installer. See PHP 7.3 release information and PHP 7.3 vs 7.2 vs 7.1 vs 7.0 benchmarks.
yum -y update; curl -O https://centminmod.com/betainstaller73.sh && chmod 0700 betainstaller73.sh && bash betainstaller73.sh
Once install completes, you’ll have some basic info including mysql root password, memcached password and a post-install check list of major software installed’s version numbers and also some install time stats.
---------------------------------------------------------------------------
Total Curl Installer YUM Time: 92.0033 seconds
Total YUM Time: 43.166100082 seconds
Total YUM + Source Download Time: 58.0522
Total Nginx First Time Install Time: 135.9561
Total PHP First Time Install Time: 130.5067
Download Zip From Github Time: 4.1942
Total Time Other eg. source compiles: 206.9870
Total Centmin Mod Install Time: 531.5020
---------------------------------------------------------------------------
Total Install Time (curl yum + cm install + zip download): 627.6995 seconds
---------------------------------------------------------------------------
You can also find this info later on in Centmin Mod logs directory at /root/centminlogs. Every centmin.sh
menu run has a log created and is time stamped for easier reference.
For example listing in reverse time ascending order (most recent last).
ls -lAhrt /root/centminlogs/
total 4.0M
-rw-r--r-- 1 root root  19K Jun 16 05:31 centminmod_1.2.3-eva2000.08_160615-012722_yuminstall_centos6.log
-rw-r--r-- 1 root root  71K Jun 16 05:32 centminmod_yumtimes_160615-012722.log
-rw-r--r-- 1 root root   38 Jun 16 05:32 centminmod_profiletimes_160615-012722.log
-rw-r--r-- 1 root root 251K Jun 16 05:32 centminmod_downloadtimes_160615-012722.log
-rw-r--r-- 1 root root  199 Jun 16 05:32 securedtmp.log
-rw-r--r-- 1 root root   44 Jun 16 05:34 centminmod_libresslinstalltime_160615-012722.log
-rw-r--r-- 1 root root 1.2K Jun 16 05:34 gcc_native.log
-rw-r--r-- 1 root root 959K Jun 16 05:35 centminmod_ngxinstalltime_160615-012722.log
-rw-r--r-- 1 root root   58 Jun 16 05:38 centminmod_phpinstalltime_160615-012722.log
-rw-r--r-- 1 root root  21K Jun 16 05:41 centminmod_1.2.3-eva2000.08_160615-012722_yum-log.log
-rw-r--r-- 1 root root   20 Jun 16 05:41 install.utc.time.log
-rw-r--r-- 1 root root 2.7M Jun 16 05:41 centminmod_1.2.3-eva2000.08_160615-012722_install.log
We hope you can know How to install Centmin Mod on CentOS with steps to setup above. And now, we will change to “how to use centmin mod?” with basic step for new users.
How to use Centmin Mod?
Read, bookmark and regularly check back with the Getting Started Guide. Also read the How to troubleshoot Centmin Mod initial install issues guide. Reading Getting Started Guide
is the most important thing you can do after Centmin Mod install as it
gives you a good understanding and starting point to everything else –
including adding Nginx vhost/domains (centmin.sh option 2), upgrade/downgrade/recompiling Nginx (centmin.sh menu option 4), PHP (menu option 5) etc.
Log out of SSH and log back into SSH and run centmin.sh command to invoke the menu options. You can find the resource video for finding centmin.sh at How to find and run centmin.sh menu options for Centmin Mod LEMP stack based servers
--------------------------------------------------------
Centmin Mod 1.2.3-eva2000.08 - http://centminmod.com
--------------------------------------------------------
                   Centmin Mod Menu
--------------------------------------------------------
1).  Centmin Install
2).  Add Nginx vhost domain
3).  NSD setup domain name DNS
4).  Nginx Upgrade / Downgrade
5).  PHP Upgrade / Downgrade
6).  XCache Re-install
7).  APC Cache Re-install
8).  XCache Install
9).  APC Cache Install
10). Memcached Server Re-install
11). MariaDB 5.2, 5.5, 10, 10.1 Upgrade Sub-Menu
12). Zend OpCache Install/Re-install
13). Install ioping.sh vbtechsupport.com/1239/
14). SELinux disable
15). Install/Re-install ImageMagick PHP Extension
16). Change SSHD Port Number
17). Multi-thread compression: pigz,pbzip2,lbzip2,p7zip etc
18). Suhosin PHP Extension install
19). Install FFMPEG and FFMPEG PHP Extension
20). NSD Re-install
21). Update - Nginx + PHP-FPM + Siege
22). Add WordPress Nginx vhost + WP Super Cache
23). Update Centmin Mod Code Base
24). Exit
--------------------------------------------------------
Enter option [ 1 - 24 ]
Check out how to setup centmin.sh menu option 23, submenu option 1 so you can setup git environment for easier Centmin Mod LEMP script code updates Beta Branch – New .08 beta menu option – updating Centmin Mod via git. You can also setup a cronjob to auto update too see Beta Branch – Cronjob Auto Updating Centmin Mod .08 beta03 How To Guide
centmin.sh option 23 submenu options
--------------------------------------------------------
        Centmin Mod Updater Sub-Menu
--------------------------------------------------------
1). Setup Centmin Mod Github Environment
2). Update Centmin Mod Current Branch
3). Update Centmin Mod Newer Branch
4). Back to Main menu
--------------------------------------------------------
Enter option [ 1 - 4 ]
Once git environment setup, hit submenu option 4 to go back to main menu, hit menu option 24 to exit centmin.sh. Then log out of SSH and back in to complete setup.
In this article, we hope you will know how to install centmin mod and how to use it! Good luck to you.

