• Contact
  • Contact Us
  • Disclamer
  • Home 1
  • Home 2
  • Home 3
  • Privacy Policy
Friday, May 9, 2025
How VPS - How to use/setup VPS
  • Login
  • Home
  • Management guides
    • Web servers software
      • Directadmin
      • Hocvps Script
      • Centmin Mod
      • CWP
      • Kloxo-MR
      • Plesk
    • Control Panels
    • Securing VPS/Servers
      • SSL Certificates
      • Upgrading
      • Authentication
  • Operating System
    • CentOS
    • Fedora
    • Debian
    • Linux
    • Arch
    • BSD
    • CoreOS
  • Reviews
  • Coupon
    • Domain Coupon
    • Hosting Coupon
No Result
View All Result
How VPS - How to use/setup VPS
No Result
View All Result
Home Operating System CentOS

How to Install Booked Scheduler on CentOS 7

How VPS by How VPS
October 1, 2019
in CentOS
0
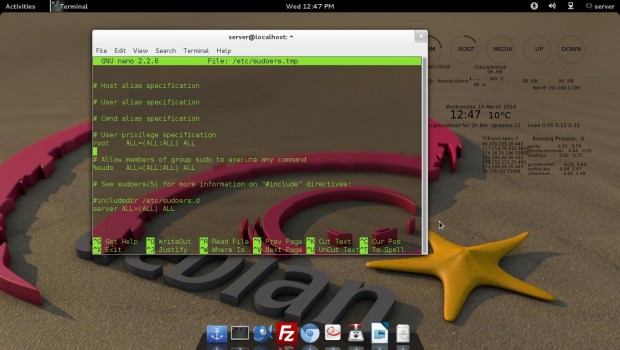
Difference Between su and sudo and How to Configure sudo in Linux
0
SHARES
96
VIEWS
Share on FacebookShare on Twitter

Contents

  1. Using a Different System?
  2. Prerequisites
  3. Step 1: Update the System
  4. Step 2: Install LAMP
  5. Step 3: Configure MariaDB
  6. Step 4: Install Booked Scheduler
  7. Step 5: Configure Apache for Booked Scheduler
  8. Step 6: Configure Booked Scheduler
  9. Step 7: Access Booked Scheduler
  10. Want to contribute?

Using a Different System?

  • How to Install Booked Scheduler on Ubuntu 16.04

Are we missing a guide for your target system? Request one, or submit your own!


Prerequisites

  • A Vultr CentOS 7 server instance.
  • A sudo user.

Step 1: Update the System

First, update your system server to the latest version.

sudo yum update -y

Once your system is up-to-date, restart the system and login with sudo user.

Step 2: Install LAMP

Before starting, you will need to install Apache, PHP, MySQL and other PHP libraries on your system.

You can install all of them with the following command.

sudo yum install httpd mariadb-server php php-mysql wget unzip -y

Once the installation is complete, start Apache and MariaDB and enable them to start at boot.

sudo systemctl start httpd
sudo systemctl enable httpd
sudo systemctl start mariadb
sudo systemctl enable mariadb

Step 3: Configure MariaDB

First, you will need to secure MariaDB. You can secure it by running the mysql_secure_installation script.

sudo mysql_secure_installation

Answer all the questions as shown below.

Set root password? [Y/n] Y
New password: <STRONG_PASSWORD>
Re-enter new password: <STRONG_PASSWORD>
Remove anonymous users? [Y/n] Y
Disallow root login remotely? [Y/n] Y
Remove test database and access to it? [Y/n] Y
Reload privilege tables now? [Y/n] Y

When all is done, connect to the MySQL shell.

mysql -u root -p

Enter your password, then create a new database and user for Booked Scheduler.

MariaDB [(none)]>create database bookeddb;
MariaDB [(none)]>create user booked@localhost identified by 'password';
MariaDB [(none)]>grant all privileges on bookeddb.* to booked@localhost identified by 'password';
MariaDB [(none)]>flush privileges;
MariaDB [(none)]>exit;

Step 4: Install Booked Scheduler

You can download the latest version of the Booked Scheduler from the Sourceforge download page.

wget https://excellmedia.dl.sourceforge.net/project/phpscheduleit/Booked/2.6/booked-2.6.7.zip

After downloading, extract the downloaded file.

unzip booked-2.6.7.zip

Next, move the extracted directory to the apache web root directory.

sudo mv booked /var/www/html/

Next, change ownership of the booked directory to the www-data user and group.

sudo chown -R apache:apache /var/www/html/booked

Step 5: Configure Apache for Booked Scheduler

Next, you will need to create a new apache virtual host file for Booked Scheduler.

sudo nano /etc/httpd/conf.d/booked.conf

Add the following lines.

<VirtualHost *:80>
  ServerName yourdomain.com
  DocumentRoot /var/www/html/booked
<Directory /var/www/bookedscheduler>
  Options -Indexes +FollowSymLinks +MultiViews
  AllowOverride All
  Require all granted
</Directory>
  ErrorLog /var/log/apache2/booked-error.log
  CustomLog /var/log/apache2/booked-access.log combined
</VirtualHost> 

Save and close the file when you are finished, then restart apache.

sudo systemctl restart httpd

Step 6: Configure Booked Scheduler

First, you will need to copy the sample configuration file.

cd /var/www/html/booked/config/
sudo cp config.dist.php config.php

Next, open config.php file and make some changes as per your requirements.

sudo nano config.php

Make the following changes.

$conf['settings']['default.timezone'] = 'Asia/Kolkata';
$conf['settings']['admin.email'] = '[email protected]';         // email address of admin user
$conf['settings']['admin.email.name'] = 'John Smith';
$conf['settings']['script.url'] = 'http://yourdomain.com/Web';
$conf['settings']['database']['type'] = 'mysql';
$conf['settings']['database']['user'] = 'booked';
$conf['settings']['database']['password'] = '';
$conf['settings']['database']['hostspec'] = '127.0.0.1';
$conf['settings']['database']['name'] = 'bookeddb';

Save the file when you are finished.

Next, import the database schema and data.

cd /var/www/html/booked
mysql -u booked -p bookeddb < database_schema/create-schema.sql
mysql -u booked -p bookeddb < database_schema/create-data.sql

Step 7: Access Booked Scheduler

Once the Booked Scheduler is configured. Open your web browser and navigate to the URL http://yourdomain.com/Web/register.php. You will be redirected to the Registration page:

How to Install Booked Scheduler on CentOS 7

Provide all of the details and click on the Register button. You will see the Booked Scheduler dashboard:

How to Install Booked Scheduler on CentOS 7

Want to contribute?

You could earn up to $300 by adding new articles

Submit your article
Suggest an update
Request an article
Previous Post

How to Install Craft CMS on CentOS 7

Next Post

Better Monitoring Tools For Ubuntu And CentOS

Next Post

Better Monitoring Tools For Ubuntu And CentOS

Leave a Reply Cancel reply

Your email address will not be published. Required fields are marked *

No Result
View All Result

Recent Post

Install Imagemagick on CentOS
CentOS

Install Imagemagick on CentOS

by How VPS
June 28, 2023
0

This is how I installed Imagemagick on a vanilla CentOS server Start off by installing the prerequisites yum install php-pear...

Read more
how to Check phpinfo

How to Check phpinfo of Hosting or VPS?

June 28, 2023
Failed to download metadata for repo 'appstream' on Centos 8

How to fix error: Failed to download metadata for repo ‘appstream’ on Centos 8

February 25, 2022
How to Fix MySQL Error "Plugin 'InnoDB' registration as a STORAGE ENGINE failed"?

How to Fix MySQL Error “Plugin ‘InnoDB’ registration as a STORAGE ENGINE failed”?

November 17, 2020
How to optimize Mysql or MariaDB

How to optimize Mysql or MariaDB

November 3, 2020

Recent News

  • Install Imagemagick on CentOS
  • How to Check phpinfo of Hosting or VPS?
  • How to fix error: Failed to download metadata for repo ‘appstream’ on Centos 8

Category

  • Arch
  • Authentication
  • Backups
  • BSD
  • Centmin Mod
  • CentOS
  • Control Panels
  • CoreOS
  • CWP
  • Debian
  • Directadmin
  • Encryption
  • Fedora
  • Firewalls
  • Hocvps Script
  • Hosting providers
  • Kloxo-MR
  • Linux
  • Mitigations
  • Operating System
  • Plesk
  • Reviews
  • Securing VPS/Servers
  • Security Patches
  • SSL Certificates
  • Uncategorized
  • Upgrading
  • VPS/Servers management guides
  • Vulnerability Detection
  • Web servers software
  • Webhosting Control Panel
  • About
  • Advertise
  • Careers
  • Contact

© 2025 JNews - Premium WordPress news & magazine theme by Jegtheme.

No Result
View All Result
  • Home
  • Management guides
    • Web servers software
      • Directadmin
      • Hocvps Script
      • Centmin Mod
      • CWP
      • Kloxo-MR
      • Plesk
    • Control Panels
    • Securing VPS/Servers
      • SSL Certificates
      • Upgrading
      • Authentication
  • Operating System
    • CentOS
    • Fedora
    • Debian
    • Linux
    • Arch
    • BSD
    • CoreOS
  • Reviews
  • Coupon
    • Domain Coupon
    • Hosting Coupon

© 2025 JNews - Premium WordPress news & magazine theme by Jegtheme.

Welcome Back!

Login to your account below

Forgotten Password?

Retrieve your password

Please enter your username or email address to reset your password.

Log In
Thabet