How to setup Directadmin on Google Compute Engine VM/ Amazon cloud? To install Directadmin on VPS / Server of the hosting service providers is quite simple, but the deployment of Directadmin on Google Cloud or Amazon VPS is not the same as the instructions of the software manufacturer. After tinkering with trial installation, I have successfully installed Directadmin on Google Cloud VPS, so today I write “How to setup Directadmin on Google Compute Engine VM/ Amazon cloud” to guide people how to install Directadmin.
How to setup Directadmin on Google Compute Engine VM/ Amazon cloud
Open the necessary ports for VPS on Google Compute Engine VM/ Amazon cloud:
Ports to be opened include: 21,22,2222,35,000: 35999. Inside:
– Port 21 for FTP
– Port 22 and 35000: 35999 for SSH login
– Port 2222 for Directadmin login page
To open port, select Menu => VPC Network => Firewall Rule:

Then click Create Firewall Rule:

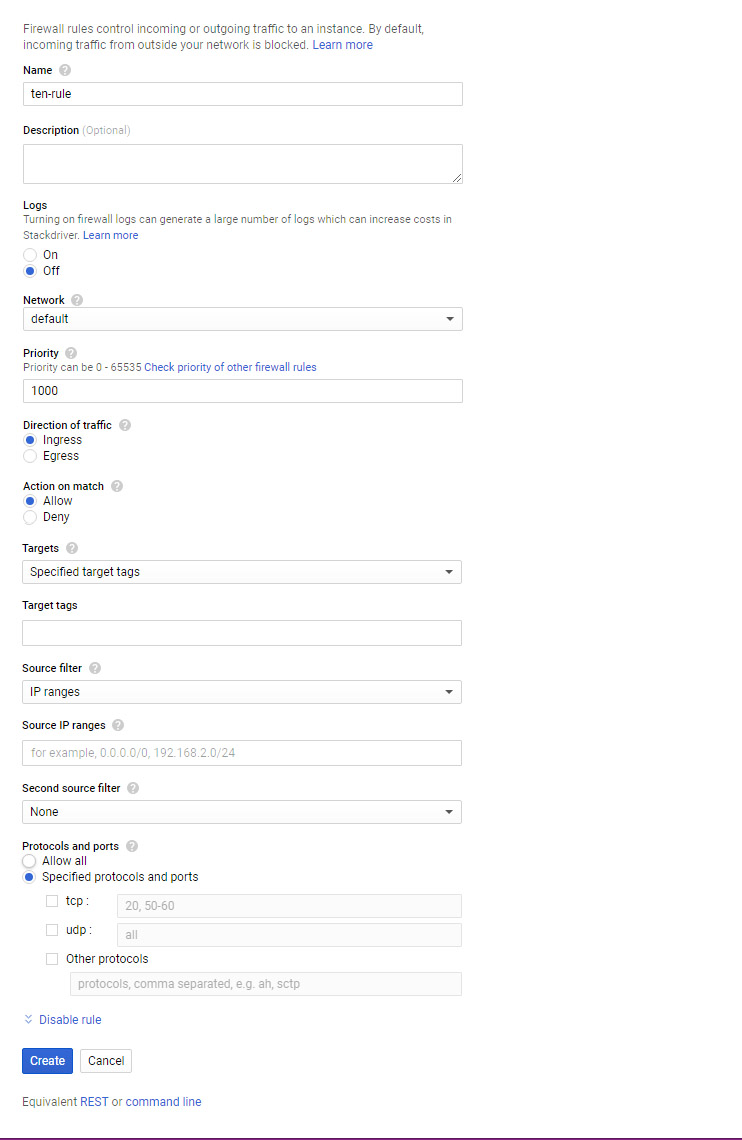
First open port 21, you need to name the rule and select the same items as in the picture:
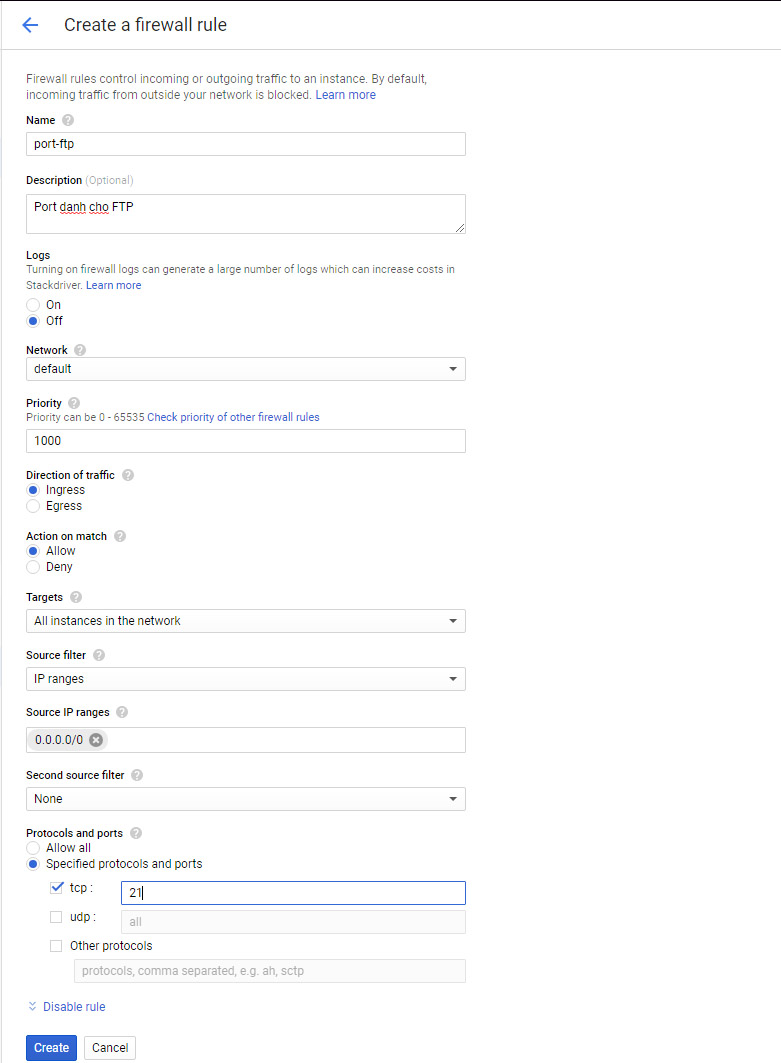
After filling and selecting items as in the picture, select Create.
Create the same rule for the remaining ports 22, 2222,35000: 35999.
Login SSH & Configure Network IP, Firewalld service:
– If you cannot login SSH in the usual way, you can refer to the article How to login using SSH for my Google Cloud (Google VPS).
Login as root:
sudo -s
Stop Firewalld:
systemctl mask firewalld
systemctl stop firewalld
Then I followed on CentOS 7, xfs is used by default and Quotas are not activated, so you need to enable them manually
nano /etc/default/grub
add quota options rootflags=usrquota,grpquota into the end of GRUB_CMDLINE_LINUX line, it will look like this
GRUB_CMDLINE_LINUX="crashkernel=auto console=ttyS0,38400n8 rootflags=usrquota,grpquota"
Make a backup
cp /boot/grub2/grub.cfg /boot/grub2/grub.cfg.back
Generate a new configuration file:
grub2-mkconfig -o /boot/grub2/grub.cfg
Restart the server, the root directory will be mounted with required options. We can check by running this command
mount | grep '/'
If you see:
/dev/xvda1 on / type xfs (rw,relatime,attr2,inode64,usrquota,grpquota)
That means you have successfully configured.
Add network eth0:0
By default, GCP use private IP for eth0, to install DirectAdmin, we need to use the public IP
nano /etc/sysconfig/network-scripts/ifcfg-eth0:0
Enter the following content
DEVICE=eth0:0
BOOTPROTO=none
ONPARENT=yes
IPADDR=xxx.xxx.xxx.xxx
NETMASK=255.255.255.0
ONBOOT=yes
where xxx.xxx.xxx.xxx is your AWS Public IP, then restart the network
/etc/init.d/network restart
If you wish to you IPv6, set your eth0:0 live below:
IPV6INIT="yes"
IPV6ADDR=2600:1f16:xxxxxxxxxxxx
Setup DirectAdmin
Run this command:
echo 1 > /root/.lan
wget http://www.directadmin.com/setup.sh
chmod 755 setup.sh
./setup.sh
To install Directadmin, please refer to our article: How to install Directadmin on Linux?
Note: And follow the instructions. Note when you asked for the network, enter eth0:0
Configuration LAN & Directadmin
Since GCP run on a LAN/NAT and behind the firewall, we need to do some config.
Enable LAN
nano /usr/local/directadmin/conf/directadmin.conf
Add this value lan_ip=yyy.yyy.yyy.yyy where yyy.yyy.yyy.yyy is your GCP Private IP
Link the Private IP to your Public IP using the DA Linked IP feature
- Add the LAN IP to DA’s IP manager. Don’t assign it to any Users or Domains.
- View the details of the external IP: Admin Level -> IP Manager -> Click the public/external IP.
- Link the internal IP to the external IP: Select the LAN IP from the drop down.
- Only select Apache, do not select DNS


Run:
service directadmin restart
Open ports for FTP
I like to use (https://www.configserver.com/cp/csf.html) to manage my firewall settings on command line and via DA.
If you use ProFTPD, edit it’s configure file:
nano /etc/proftpd.conf
Add after PassivePorts: MasqueradeAddress xxx.xxx.xxx.xxx where xxx.xxx.xxx.xxx is your AWS Public IP
Add rule to the iptables
iptables -I INPUT -p tcp –dport 35000:35999 -j ACCEPT
nano /usr/libexec/iptables/iptables.init
add $IPTABLES -A INPUT -p tcp –dport 35000:35999 -j ACCEPT below the ftp section, like this
#########################
# ftp
$IPTABLES -A INPUT -p tcp --dport 21 -j ACCEPT
$IPTABLES -A INPUT -p tcp --dport 35000:35999 -j ACCEPT

