• Contact
  • Contact Us
  • Disclamer
  • Home 1
  • Home 2
  • Home 3
  • Privacy Policy
Friday, May 9, 2025
How VPS - How to use/setup VPS
  • Login
  • Home
  • Management guides
    • Web servers software
      • Directadmin
      • Hocvps Script
      • Centmin Mod
      • CWP
      • Kloxo-MR
      • Plesk
    • Control Panels
    • Securing VPS/Servers
      • SSL Certificates
      • Upgrading
      • Authentication
  • Operating System
    • CentOS
    • Fedora
    • Debian
    • Linux
    • Arch
    • BSD
    • CoreOS
  • Reviews
  • Coupon
    • Domain Coupon
    • Hosting Coupon
No Result
View All Result
How VPS - How to use/setup VPS
No Result
View All Result
Home Operating System CentOS

Setup HTTP Authentication With Nginx on CentOS 7

How VPS by How VPS
February 14, 2020
in CentOS
0
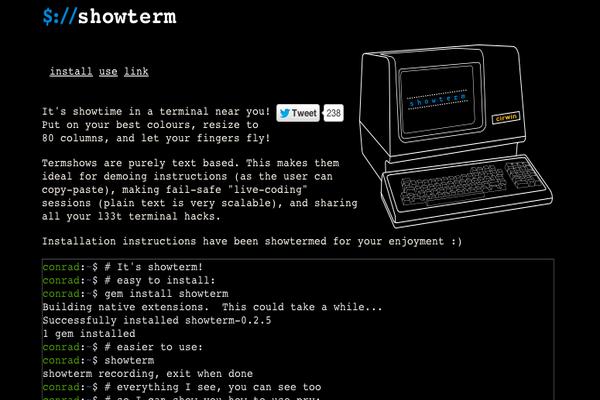
Showterm.io – A Terminal/Shell Recording, Upload and Share Tool for Linux
0
SHARES
24
VIEWS
Share on FacebookShare on Twitter

Setup HTTP Authentication With Nginx on CentOS 7

  1. Requirements
  2. Let’s get started
  3. Setup complete

In this guide, you will learn how to Setup HTTP Authentication With Nginx on CentOS 7 (setup HTTP authentication for an Nginx web server running on CentOS 7).

Setup HTTP Authentication With Nginx on CentOS 7

Requirements

To get started, you’ll need the following things:

  • SSH Client (like PuTTY, Bitvise SSH, etc)
  • VPS Server with CentOS 7 x64 installed.
  • Nginx installed on the server.

Let’s get started

Install the httpd-tools package.

yum install httpd-tools

Create an .htpasswd file.

htpasswd -c /path/to/directory/.htpasswd username

The .htpasswd file will contain the information about username and password. /path/to/directory – is the full path to the directory for which we want to set-up authentication. username – we will use that for authentication – you can choose what ever you want. You will be asked to enter a password for the user. Enter a secure password and confirm it by re-entering the same password again.

We have successfully created the user for authentication, now the only thing left to do is to modify the Nginx configuration to use the .htpasswd file, which we have just created.

You will find your default configuration under /etc/nginx/conf.d/default.conf.

We are going to add 2 lines to the configuration.

server {
    listen       80;
    server_name  example.com www.example.com;

    location / {
        root /path/to/directory/;
        index index.php index.html index.htm;
        auth_basic "Restricted area - This system is for the use of authorized users only!";
        auth_basic_user_file /path/to/directory/.htpasswd
    }

In particular, we’ve added these lines:

auth_basic "Restricted area - This system is for the use of authorized users only";
auth_basic_user_file /path/to/directory/.htpasswd

The first line defines the text showed in the login box when visiting the secured directory and the second line contains the path to our .htpasswd file.

Save the configuration and restart the Nginx service with /etc/init.d/nginx restart

Setup complete

Visit the secured directory on your website. You will see a login prompt that looks like this:

Setup HTTP Authentication With Nginx on CentOS 7

Type in your username and password and you’ll be granted access.

Previous Post

Setup NGINX with ModSecurity on CentOS 6

Next Post

How to Install BoltWire CMS on CentOS 7

Next Post
How to Install BoltWire CMS on CentOS 7

How to Install BoltWire CMS on CentOS 7

Leave a Reply Cancel reply

Your email address will not be published. Required fields are marked *

No Result
View All Result

Recent Post

Install Imagemagick on CentOS
CentOS

Install Imagemagick on CentOS

by How VPS
June 28, 2023
0

This is how I installed Imagemagick on a vanilla CentOS server Start off by installing the prerequisites yum install php-pear...

Read more
how to Check phpinfo

How to Check phpinfo of Hosting or VPS?

June 28, 2023
Failed to download metadata for repo 'appstream' on Centos 8

How to fix error: Failed to download metadata for repo ‘appstream’ on Centos 8

February 25, 2022
How to Fix MySQL Error "Plugin 'InnoDB' registration as a STORAGE ENGINE failed"?

How to Fix MySQL Error “Plugin ‘InnoDB’ registration as a STORAGE ENGINE failed”?

November 17, 2020
How to optimize Mysql or MariaDB

How to optimize Mysql or MariaDB

November 3, 2020

Recent News

  • Install Imagemagick on CentOS
  • How to Check phpinfo of Hosting or VPS?
  • How to fix error: Failed to download metadata for repo ‘appstream’ on Centos 8

Category

  • Arch
  • Authentication
  • Backups
  • BSD
  • Centmin Mod
  • CentOS
  • Control Panels
  • CoreOS
  • CWP
  • Debian
  • Directadmin
  • Encryption
  • Fedora
  • Firewalls
  • Hocvps Script
  • Hosting providers
  • Kloxo-MR
  • Linux
  • Mitigations
  • Operating System
  • Plesk
  • Reviews
  • Securing VPS/Servers
  • Security Patches
  • SSL Certificates
  • Uncategorized
  • Upgrading
  • VPS/Servers management guides
  • Vulnerability Detection
  • Web servers software
  • Webhosting Control Panel
  • About
  • Advertise
  • Careers
  • Contact

© 2025 JNews - Premium WordPress news & magazine theme by Jegtheme.

No Result
View All Result
  • Home
  • Management guides
    • Web servers software
      • Directadmin
      • Hocvps Script
      • Centmin Mod
      • CWP
      • Kloxo-MR
      • Plesk
    • Control Panels
    • Securing VPS/Servers
      • SSL Certificates
      • Upgrading
      • Authentication
  • Operating System
    • CentOS
    • Fedora
    • Debian
    • Linux
    • Arch
    • BSD
    • CoreOS
  • Reviews
  • Coupon
    • Domain Coupon
    • Hosting Coupon

© 2025 JNews - Premium WordPress news & magazine theme by Jegtheme.

Welcome Back!

Login to your account below

Forgotten Password?

Retrieve your password

Please enter your username or email address to reset your password.

Log In
Thabet