 In this tutorial we will cover how-to Setup a VPS to host a Website. We will cover everything you need to setup including Apache, PHP, Perl/cgi, and MySQL. Lately we will install WordPress as a basic website. You can install anything you like though if you don’t prefer WordPress.
We will also explain some important security topics how how you can mitigate some of the more common threats. This tutorial is written to be suitable for all skill levels. So you may find some of the early steps almost obvious. Just remember you did not learn your skills overnight and everyone needs to get a start somewhere. 😉
The first step is choosing a VPS provider. You want a good host that has reliable support. We recommend ZoomCloud.net as they have several VPS options at very affordable prices.
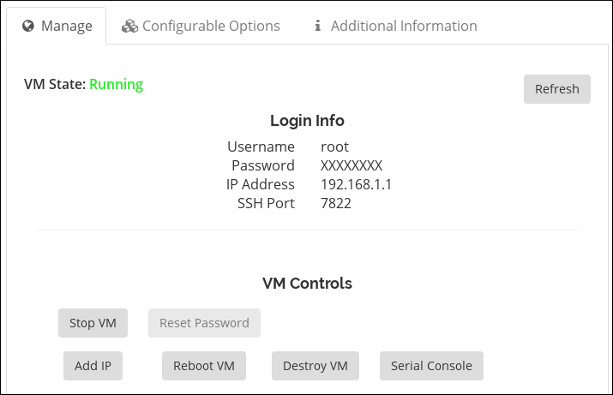
Once you have signed up and paid, your VPS is built immediately. You should receive your logon information in an email upon sign-up.
SSH To the VPS
Now that you have your new VPS system you need to logon to it. Simply SSH as the user ‘root’ to the IP address you were provisioned. See the example command below, and replace x.x.x.x with your IP address.
|
1
|
ssh root@X.X.X.X
|
Change the root password
Once you are logged in, I highly suggest you change your root password ASAP! Since you were emailed the default initial password, its not secure until you change it. Follow this example to change the root password. If all goes well you will get a message saying “passwd: all authentication tokens updated successfully”.
|
1
2
3
4
5
6
|
[root@testing ~]# passwd
Changing password for user root.
New password:
Retype new password:
passwd: all authentication tokens updated successfully.
[root@testing ~]#
|
Update System Packages
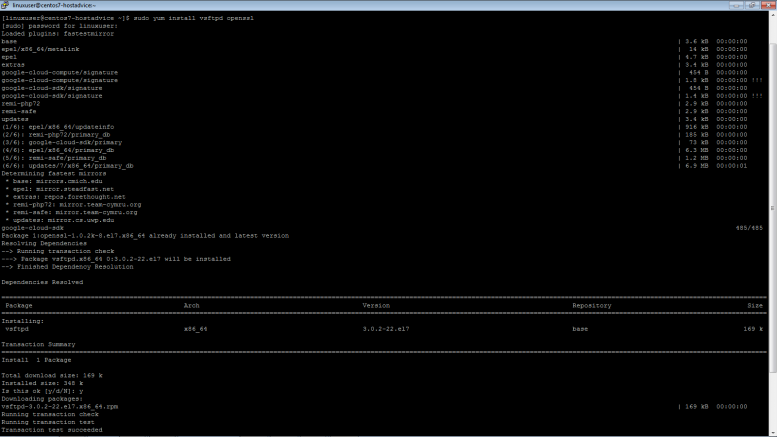
Next, you should go ahead and get all the base OS packages updated before we go installing Apache or PHP. For this we will use a program called ‘yum’. Yum is the default package manager for RedHat Linux and CentOS. Follow the next example to update your packages using yum.
|
1
2
3
4
5
6
7
8
9
10
11
12
13
14
15
16
17
18
19
20
21
22
23
24
25
26
27
|
[root@testing ~]# yum update
Loaded plugins: fastestmirror
Determining fastest mirrors
* base: mirrors.greenmountainaccess.net
* extras: mirrors.lga7.us.voxel.net
* updates: mirror.thelinuxfix.com
base | 3.7 kB 00:00
base/primary_db | 4.6 MB 00:00
extras | 3.4 kB 00:00
extras/primary_db | 30 kB 00:00
updates | 3.4 kB 00:00
updates/primary_db | 1.5 MB 00:00
Setting up Update Process
Resolving Dependencies
—> Running transaction check
—-> Package audit.x86_64 0:2.2–2.el6 will be updated
—-> Package audit.x86_64 0:2.3.7–5.el6 will be an update
—-> Package audit–libs.x86_64 0:2.2–2.el6 will be updated
...
...
Transaction Summary
================================================================================
Install 1 Package(s)
Upgrade 108 Package(s)
Total download size: 112 M
Is this ok [y/N]: Y
|
Once its finished you will get a message saying ‘Complete!’.
Installing Apache, PHP, Perl, and MySQL
Next up you need to install your web server (Apache), code interpreters (PHP & Perl/CGI), and Database Server (MySQL). You can do this all with one command using yum.
|
1
|
yum install httpd php php–mysql perl mysql mysql–server
|
Configure Apache
If you are just hosting one site you can store your files in /var/www and call it a day, but why waste the power of your VPS? You can easily setup multiple websites on the same VPS by using Apache Virtual Hosts.
I like to create a user per website and then host the files for that website in the users ‘public_html’ folder inside their home folder. This makes it easy to keep track of and offers additional security. Should one of your sites become compromised, it should not impact the others. One more layer to the security onion….
First lets create a user called ‘example’, create their ‘public_html’ folder, and give them permissions to it.
|
1
2
3
4
5
6
7
8
9
10
11
12
|
[root@testing www]# useradd example
[root@testing www]# passwd example
Changing password for user example.
New password:
Retype new password:
passwd: all authentication tokens updated successfully.
[root@testing www]#
[root@testing www]# mkdir /home/example/public_html
[root@testing www]# chown example:example /home/example/public_html/
[root@testing www]# chmod 755 /home/example/public_html/
[root@testing www]# chown 711 /home/example/
[root@testing www]#
|
Next you need to edit ‘/etc/httpd/conf/httpd.conf’ using vi (you can also use pico if you find it easier).
|
1
|
[root@testing www]# vi /etc/httpd/conf/httpd.conf
|
Scroll down to the bottom of the file and add the following lines. Change the X.X.X.X to your servers IP address and anywhere you see example.com to your domain name. Also modify the home directory paths for your username instead of /home/example/. Simply add another virtual host section if you want to host another domain.
|
1
2
3
4
5
6
7
8
9
10
11
12
13
14
15
16
17
18
|
NameVirtualHost *:80
<VirtualHost *:80>
RewriteEngine on
RewriteCond %{HTTP_HOST} ^www/.example/.com$ [NC]
RewriteRule ^(.*)$ http://example.com$1 [R=301,L]
ServerName example.com
ServerAlias www.exapmle.com
DocumentRoot /home/example/public_html
ErrorLog /var/log/example.com_error_log
CustomLog /var/log/example.com_access_log combined
DirectoryIndex index.html index.htm index.php index.php4 index.php5
SetOutputFilter DEFLATE
<Directory /home/example/public_html>
Options –Indexes +IncludesNOEXEC +SymLinksifOwnerMatch +ExecCGI
allow from all
AllowOverride All
</Directory>
</VirtualHost>
|
Save and exit the file, then start apache. Lastly make sure you set it to start on boot.
|
1
2
|
[root@testing www]# /etc/init.d/httpd start
[root@testing www]# chkconfig httpd on
|
Now point the A record for your URL in your DNS to your IP address (tip: use CloudFlare’s DNS for Free). Clear your local DNS cache or wait a few minutes after changing your DNS A record. Then browse to your domain and you should be presented with a default apache webpage. Its the default page because you have not placed any files in the public_html directory. This OK for now. We will place something there a little later in this tutorial. For now lets move on to the next step, How-to Setup MySql on a VPS.
Configure MySQL
MySQL has a root account that is separate from the system root account. It has a separate password which you should set.
First Start Mysql and make sure its set to start automatically on boot.
|
1
2
|
[root@testing www]# /etc/init.d/mysqld start
[root@testing www]# chkconfig mysqld on
|
Now you need to connect to the MySQL server and set your root password. You can issue the following commands to do this.
|
1
2
3
4
5
6
7
8
9
10
|
[root@testing www]# mysql -u root
mysql> UPDATE mysql.user SET Password = PASSWORD(‘NewPassWord’)
-> WHERE User = ‘root’;
Query OK, 0 rows affected (0.00 sec)
Rows matched: 3 Changed: 0 Warnings: 0
mysql> FLUSH PRIVILEGES;
Query OK, 0 rows affected (0.00 sec)
mysql> quit
|
Next you should create a MySQL user and give that user access to their own database for each site you want to create that needs a database. Again be sure to change ‘example’ and ‘NEWPASSWORD’ to your username and your password. Don’t forget this password. You will need it when setting up your website.
|
1
2
3
4
5
6
7
8
9
10
11
12
13
14
15
16
17
|
[root@testing www]# mysql -u root -p
Enter password:
Welcome to the MySQL monitor. Commands end with ; or /g.
mysql> create database example;
Query OK, 1 row affected (0.00 sec)
mysql> grant usage on *.* to quickvds@localhost identified by ‘NEWPASSWORD’;
Query OK, 0 rows affected (0.00 sec)
mysql> grant all privileges on example.* to example@localhost ;
Query OK, 0 rows affected (0.00 sec)
mysql> FLUSH PRIVILEGES;
Query OK, 0 rows affected (0.00 sec)
mysql> quit
|
Thats all there is to Setting up MySQL!
Configure IPTables on a VPS
As an additional security measure you should enable a firewall on your VPS. The IPTables Firewall is available by default on all CentOS Installations, but by default it is disabled. Before we just turn it on, you need to make sure you create some firewall rules first.
On your VPS make sure the firewall is stopped and then edit /etc/sysconfig/iptables. if you never started IPTables before this file likely won’t exist yet. Go ahead and create it and then paste the following lines into the file and save it.
|
1
2
3
4
5
6
7
8
9
10
11
12
13
14
15
16
17
18
19
20
21
22
23
24
25
26
27
28
29
30
31
32
33
34
35
36
37
38
39
40
41
42
43
44
45
|
*nat
:PREROUTING ACCEPT [1:76]
:POSTROUTING ACCEPT [0:0]
:OUTPUT ACCEPT [0:0]
COMMIT
*mangle
:PREROUTING ACCEPT [0:0]
:INPUT ACCEPT [0:0]
:FORWARD ACCEPT [0:0]
:OUTPUT ACCEPT [0:0]
:POSTROUTING ACCEPT [0:0]
COMMIT
*filter
:FORWARD ACCEPT [0:0]
:INPUT DROP [0:0]
:OUTPUT ACCEPT [0:0]
# Accept traffic from internal interfaces
–A INPUT ! –i eth0 –j ACCEPT
# Accept traffic with the ACK flag set
–A INPUT –p tcp –m tcp —tcp–flags ACK ACK –j ACCEPT
# Allow incoming data that is part of a connection we established
–A INPUT –m state —state ESTABLISHED –j ACCEPT
# Allow data that is related to existing connections
–A INPUT –m state —state RELATED –j ACCEPT
# Accept responses to DNS queries
–A INPUT –p udp –m udp —dport 1024:65535 —sport 53 –j ACCEPT
# Accept responses to our pings
–A INPUT –p icmp –m icmp —icmp–type echo–reply –j ACCEPT
# Accept notifications of unreachable hosts
–A INPUT –p icmp –m icmp —icmp–type destination–unreachable –j ACCEPT
# Accept notifications to reduce sending speed
–A INPUT –p icmp –m icmp —icmp–type source–quench –j ACCEPT
# Accept notifications of lost packets
–A INPUT –p icmp –m icmp —icmp–type time–exceeded –j ACCEPT
# Accept notifications of protocol problems
–A INPUT –p icmp –m icmp —icmp–type parameter–problem –j ACCEPT
# Allow connections to our SSH server
–A INPUT –p tcp –m tcp —dport 22 –j ACCEPT
# Respond to pings
–A INPUT –p icmp –m icmp —icmp–type echo–request –j ACCEPT
# Allow connections to webserver
–A INPUT –p tcp –m tcp —dport 80 –j ACCEPT
# Allow SSL connections to webserver
–A INPUT –p tcp –m tcp —dport 443 –j ACCEPT
COMMIT
|
Now start IP Tables and set it to start on boot.
|
1
2
3
|
[root@testing www]# /etc/init.d/iptables start
[root@testing www]# chkconfig iptables on
|
To make sure your rules stuck, you can run the following command. You should see your rules display.
|
1
|
[root@testing www]# /etc/init.d/iptables status
|
Setup WordPress on a VPS
Now that you have configured Apache and MySQL, you are ready to load a website in your users public_html directory. For this example we will use WordPress, but you can use any CMS you choose. Installation routines are similar for all the major Blogging platforms, but your results may vary.
First you need to download the latest version of WordPress from their website. For convenience here is a direct link to their latest version download.
You will also need a SFTP client. I personally use FileZilla, but you can use anyone you are comfortable using.
Unzip the ‘latest.zip’ and then Open your SFTP Client and connect to your server as the user you created for this website. Again change example.com you your site and example to your username.

Just select all the files in the WordPress directory and upload them into the public_html directory.
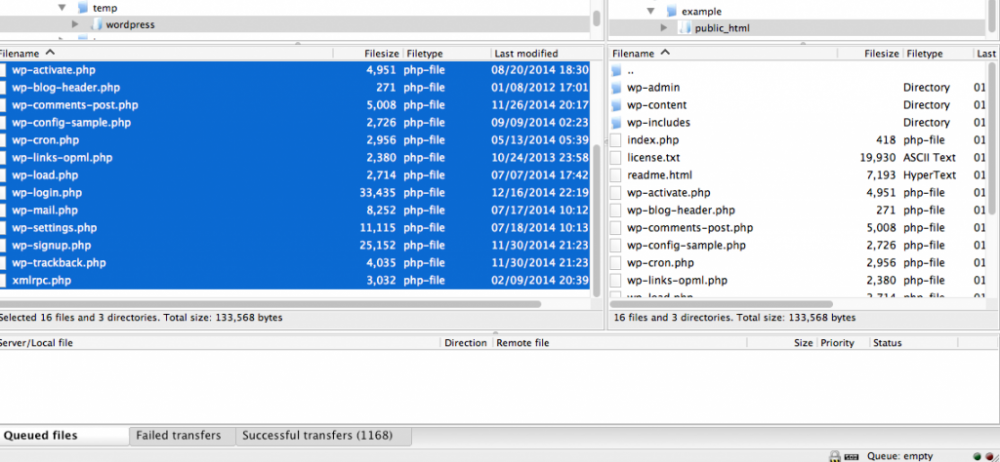
Now open up your browser and goto your url. Then follow the instructions to complete the setup for wordpress.
And thats it, you are all done. Now you can move on to setting up the site the way you want it. Just remember to repeat the steps for each additional domain you want to host on the VPS.
-Tutor

