• Contact
  • Contact Us
  • Disclamer
  • Home 1
  • Home 2
  • Home 3
  • Privacy Policy
Saturday, May 10, 2025
How VPS - How to use/setup VPS
  • Login
  • Home
  • Management guides
    • Web servers software
      • Directadmin
      • Hocvps Script
      • Centmin Mod
      • CWP
      • Kloxo-MR
      • Plesk
    • Control Panels
    • Securing VPS/Servers
      • SSL Certificates
      • Upgrading
      • Authentication
  • Operating System
    • CentOS
    • Fedora
    • Debian
    • Linux
    • Arch
    • BSD
    • CoreOS
  • Reviews
  • Coupon
    • Domain Coupon
    • Hosting Coupon
No Result
View All Result
How VPS - How to use/setup VPS
No Result
View All Result
Home Control Panels

How to Configure, Install and Deploy ASP.NET Core to IIS

How VPS by How VPS
January 30, 2020
in Control Panels
0
How to Configure, Install and Deploy ASP.NET Core to IIS
0
SHARES
294
VIEWS
Share on FacebookShare on Twitter

Contents

  1. Configuring Your ASP.NET Core App for IIS
  2. Installing .NET Core Windows Server Hosting Bundle
  3. Deploying ASP.NET Core to IISStep 1: Pick a Publish TargetStep 2: Copy Your Publish Output to Your Preferred Location
  4. Step 3: Create a New Application Pool in IIS
  5. Step 4: Load your application
  6. Conclusion

ASP.NET Core is a free and a composable framework for building web apps. It is open source and completely free. You can get it on Github. The modular framework performs significantly better than ASP.NET. In this article, you will find the complete guide for configuring, installing and deploying it to IIS.
How to Configure, Install and Deploy ASP.NET Core to IIS

Configuring Your ASP.NET Core App for IIS

When you create a new ASP.NET Core, you will see a Program.cs file, which has the following codes:

publicclassProgram
{
    publicstaticvoidMain(string[] args)
    {
        var host = new WebHostBuilder()
            .UseKestrel()
            .UseContentRoot(Directory.GetCurrentDirectory())
            .UseIISIntegration()
            .UseStartup()
            .Build();

        host.Run();
    }
}

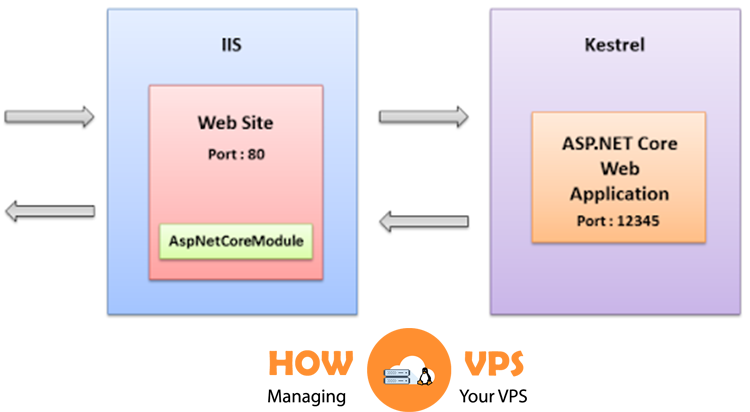
Here, WebHostBuilderis configuring and creating WebHost, which is basically an object that functions as the application and the web server. UseKestrel() is registering the IServer interface for Kestrel, which is a cross-platform web server. Here, IServer will work as a host for your app. By including UseIISIntegration(), you are using IIS as a reverse proxy in front of Kestrel.

Creating an ASP.NET Core project also results in the creation of a web.config file. It looks like this:

<?xml version="1.0" encoding="utf-8"?>
<configuration>
  <system.webServer>
    <handlers>
      <add name="aspNetCore" path="*" verb="*" modules="AspNetCoreModule" resourceType="Unspecified"/>
    </handlers>
    <aspNetCore processPath="%LAUNCHER_PATH%" arguments="%LAUNCHER_ARGS%" stdoutLogEnabled="false" stdoutLogFile=".logsstdout" forwardWindowsAuthToken="false"/>
  </system.webServer>
</configuration>

Basically, it registers AspNetCoreModule, which deals with all the incoming traffic to IIS, as an HTTP handler. It also works as a reverse proxy server. But more importantly, AspNetCoreModule is responsible for running your web app successfully.

Installing .NET Core Windows Server Hosting Bundle

You can download .NET Core Windows Server from here. You need to install it before deploying your web app. At the same time, .NET Core runtime, libraries and ASP.NET Core module will also be installed. Then you might have to run the following command in the command prompt:

net stop was /y

It will stop the IIS Admin Service and all other relevant services. Now, run this command:

net start w3svc

It will force the IIS services to re-read the registry. As a result, all the changes will be picked up for the extensible web server.

Deploying ASP.NET Core to IISStep 1: Pick a Publish TargetStep 2: Copy Your Publish Output to Your Preferred Location

Now, you have to copy the files to your desired location. In our case, we are copying them right here:

C:inetpubwwwrootAspNetCore46

If you are deploying to a local dev box, you have the option of copying the files locally. But in case of the remote server, you should compress them and then move to the server.

Step 3: Create a New Application Pool in IIS

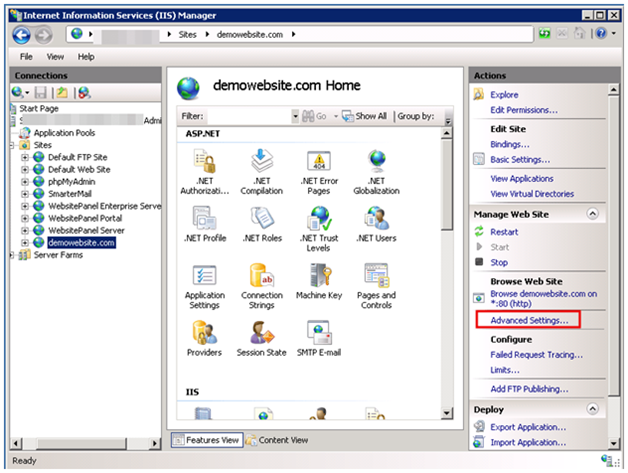
Create a new IIS application pool under the .NET CLR version of “No Managed Code.” Then create your new IIS app under your current IIS site. You can also create a new IIS site. Then point it to the folder that contains the files of your publish output.

Step 4: Load your application

In this step, your application should work perfectly. But if it doesn’t happen, open your web.config file and specify the process for IIS initiating ASP.NET Core. Also, activate out logging by setting stdoutLogEnabled to true. It will allow you to the logs, identify the issue and create a solution.

Conclusion

In this article, you have learnt the detailed way for configuring, installing and deploying ASP.NET Core to IIS. By using the extensible web server to the ASP.NET Core hosting, you can enjoy an extra level of configurability and security.

Previous Post

How to Secure PHP Integrated Into Your Web Page with Configuration Settings

Next Post

How To Configure Idle Time-out Settings For An Application Pool (IIS 7)

Next Post
How To Configure Idle Time-out Settings For An Application Pool (IIS 7)

How To Configure Idle Time-out Settings For An Application Pool (IIS 7)

Leave a Reply Cancel reply

Your email address will not be published. Required fields are marked *

No Result
View All Result

Recent Post

Install Imagemagick on CentOS
CentOS

Install Imagemagick on CentOS

by How VPS
June 28, 2023
0

This is how I installed Imagemagick on a vanilla CentOS server Start off by installing the prerequisites yum install php-pear...

Read more
how to Check phpinfo

How to Check phpinfo of Hosting or VPS?

June 28, 2023
Failed to download metadata for repo 'appstream' on Centos 8

How to fix error: Failed to download metadata for repo ‘appstream’ on Centos 8

February 25, 2022
How to Fix MySQL Error "Plugin 'InnoDB' registration as a STORAGE ENGINE failed"?

How to Fix MySQL Error “Plugin ‘InnoDB’ registration as a STORAGE ENGINE failed”?

November 17, 2020
How to optimize Mysql or MariaDB

How to optimize Mysql or MariaDB

November 3, 2020

Recent News

  • Install Imagemagick on CentOS
  • How to Check phpinfo of Hosting or VPS?
  • How to fix error: Failed to download metadata for repo ‘appstream’ on Centos 8

Category

  • Arch
  • Authentication
  • Backups
  • BSD
  • Centmin Mod
  • CentOS
  • Control Panels
  • CoreOS
  • CWP
  • Debian
  • Directadmin
  • Encryption
  • Fedora
  • Firewalls
  • Hocvps Script
  • Hosting providers
  • Kloxo-MR
  • Linux
  • Mitigations
  • Operating System
  • Plesk
  • Reviews
  • Securing VPS/Servers
  • Security Patches
  • SSL Certificates
  • Uncategorized
  • Upgrading
  • VPS/Servers management guides
  • Vulnerability Detection
  • Web servers software
  • Webhosting Control Panel
  • About
  • Advertise
  • Careers
  • Contact

© 2025 JNews - Premium WordPress news & magazine theme by Jegtheme.

No Result
View All Result
  • Home
  • Management guides
    • Web servers software
      • Directadmin
      • Hocvps Script
      • Centmin Mod
      • CWP
      • Kloxo-MR
      • Plesk
    • Control Panels
    • Securing VPS/Servers
      • SSL Certificates
      • Upgrading
      • Authentication
  • Operating System
    • CentOS
    • Fedora
    • Debian
    • Linux
    • Arch
    • BSD
    • CoreOS
  • Reviews
  • Coupon
    • Domain Coupon
    • Hosting Coupon

© 2025 JNews - Premium WordPress news & magazine theme by Jegtheme.

Welcome Back!

Login to your account below

Forgotten Password?

Retrieve your password

Please enter your username or email address to reset your password.

Log In
Thabet