How to install Zabbix on CentOS 7
Introduction

Zabbix is a powerful, open-source network and application monitoring solution. It is a robust application used to track and monitor the status of multiple servers, network devices, cloud services, and virtual machines. The software delivers numerous monitoring options including:disk space consumption, network utilization, and CPU load.
This makes Zabbix an ideal software to install on your CentOS 7 server. This tutorial will show you how to install Zabbix on your CentOS 7 system.
If you have a VPS or dedicated server hosting account with CentOS 7 installed and configured, let’s get started!
Step 1 Installing Apache And PHP
The first thing when installing Zabbix on CentOS 7 is installing both Apache and PHP on your system. This is a simple process and you only need to run the command below to accomplish it!
$ sudo yum install httpd php
Step 2 Installing The Database Server
In our case, we’ll use MariaDB as the database server. Issue the command below to install MariaDB:
$ sudo yum install mariadb-server
This will automatically install MariaDB on your CentOS system. Once this process is done, run the command below to start and then enable the database server:
$ sudo systemctl start mariadb
$ sudo systemctl enable mariadb
By now, the database server is running correctly but it’s not secured. To secure the database server, execute the command below:
$ sudo mysql_secure_installation
This will give you prompts with a number of questions. Answer the questions accordingly to enhance the security of your MariaDB database server. Once everything is set, you can proceed with the next step.
Step 3 Installing Zabbix
By default, the CentOS 7 repository doesn’t provide Zabbix packages. For this reason, we’ll install the Zabbix repository first, then install the required Zabbix packages. To deploy the Zabbix repository, execute the command below:
$ sudo rpm -ivh http://repo.zabbix.com/zabbix/3.4/rhel/7/x86_64/zabbix-release-3.4-2.el7.noarch.rpm
Once the Zabbix repository is deployed, run the command below to install Zabbix and its web front end.
$ sudo yum install zabbix-server-mysql zabbix-web-mysql
This command will install Zabbix together with the required PHP packages.
Step 4 Configuring Zabbix Database
Now, you need to create a Zabbix database as well as a MySQL user required by Zabbix to function.
First, run the command below to log in to the MariaDB shell:
$ sudo mysql -uroot -p
You will be prompted to enter the password created when securing MariaDB. Enter the password correctly and press ENTER to access MariaDB command line.
Once you are on the command line, execute the command below to create Zabbix database:
MariaDB [(none)]>
CREATEDATABASE zabbix CHARACTERSET utf8;
Next, run the command below to grant all privileges:
MariaDB [(none)]>
GRANT ALL PRIVILEGESON zabbix.* TO'zabbix'@'localhost'IDENTIFIEDBY'zabbix_passwd';
For this changes to take effect, issue the command below:
MariaDB [(none)]>
FLUSHPRIVILEGES;
Then type quit to exit the MariaDB shell.
By now the database for Zabbix is almost set. The next step is configuring Zabbix to utilize the database we have created. To accomplish this, first run the command below:
$ sudo nano /etc/zabbix/zabbix_server.conf
This will open Zabbix’s configuration file. Once the file opens, set the password to zabbix_passwd, that is:
/etc/zabbix/zabbix_server.conf

### Option: DBPassword
#       Database password. Ignored for SQLite.
#       Comment this line if no password is used.
#
# Mandatory: no
# Default:
DBPassword=zabbix_passwd
You need not change the user and name for the database; these values are set to zabbix.
Step 5 Configuring PHP
To set up PHP for the Zabbix server, first open the PHP configuration file:
$ sudo nano /etc/httpd/conf.d/zabbix.conf
Once the file opens, locate the line date.timezone and adjust the time zone to match your preferred location:
php_value max_execution_time 300
    php_value memory_limit 128M
    php_value post_max_size 16M
    php_value upload_max_filesize 2M
    php_value max_input_time 300
    php_value always_populate_raw_post_data -1
    php_value date.timezone America/Chicago
Then run the command below to restart Apache:
$ sudo systemctl restart httpd
That is it! Everything is set.
Step 6 Starting Zabbix Server
By now all the required services are correctly configured and it should be a breeze to start the newly installed Zabbix server: Simply run the command below:
$ sudo systemctl start zabbix-server
Now, execute the command below to confirm that Zabbix is running properly:
$ sudo systemctl status zabbix-server
This will give you the following output:
● zabbix-server.service - Zabbix Server
   Loaded: loaded (/usr/lib/systemd/system/zabbix-server.service; disabled; vendor preset: disabled)
   Active: active (running) since Mon 2018-10-29 09:49:13 UTC; 10s ago
  Process: 1811 ExecStart=/usr/sbin/zabbix_server -c $CONFFILE (code=exited, status=0/SUCCESS)
 Main PID: 1813 (zabbix_server)
....
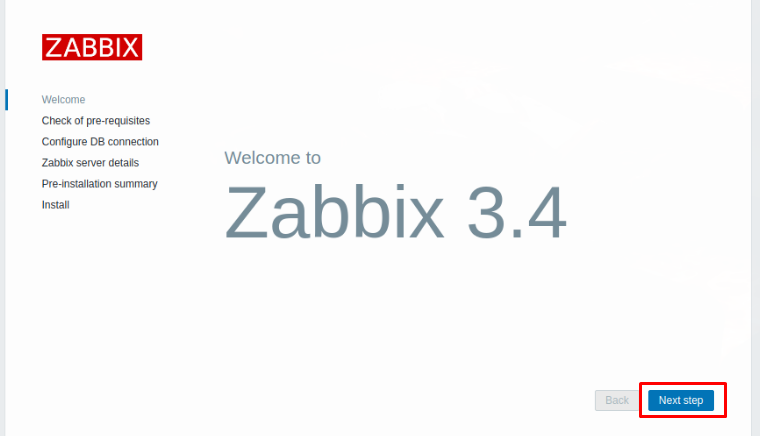
Step 7 Accessing Zabbix Web Interface
To complete the installation, go to your favorite web browser and search http://your_server_ip_address/zabbix/, Enter your login credentials for Zabbix database to access the Zabbix dashboard and complete the post-installation procedure. Once everything is done, you will access the login page for Zabbix web interface. Use admin as the username and zabbix as the password to log in.
Conclusion
Congratulation! You have installed and configured the Zabbix server on a CentOS 7 server. You can now enjoy the power, functionality, and convenience that Zabbix offers, to manage the plethora of components in your network.
If with “How to install Zabbix on CentOS 7” guide, you can’t install Zabbiz on your VPS/Server. Please comment below this post.